Functions Check
Now that all VMs are up and running, let's validate that everything is working as it should. Let's get ready to rumble!

Demonstration Threat
This functions check will demonstrate a general workflow using some of the major tools available, as well as validate that all nodes are communicating corectly.
-
From your terminal run $
vagrant ssh ts.elastomicto establish as shell session on the combo logger / attacker box. Your prompt will update to indicate you're connected to the elastomic box. -
Then, enter
pwshto drop into a Powershell session. Now it is time to choose what test or attack you would like to run against the remote Windows 10 box. You'll see your prompt change toPS /home/vagrant>. -
You can browse the available tests by referencing the Atomic Redteam Docs.
-
For this demonstration we will conduct a simple example technique and test. It will use Powershell to download Mimikatz and then dump credentials on the system. More info about this specific technique and test can be found here: T1059.001 TestNumber 1
-
Before we can run this test against the Windows 10 box we first need to setup a Powershell Session over SSH to the Windows 10 box.
-
Create a necessary variable by running the below command. Enter "yes" and the password
vagrantif prompted:$sess = New-PSSession -Hostname 192.168.33.11 -Username vagrantInfo
What does this do? We are creating a variable called
$sessand setting it's value to our new session we just created using the New-PSSession Powershell cmdlet. -
Take a moment to look at the syntax we're going to use to launch our "attack" against the remmote target (
ts.windows10):Invoke-AtomicTest # Run Atomic Test T1059.001 # Technique ID -TestNumbers 1 # TestNumber -Session $sess # Connect using our session variable -
Run the following command to kick things off:
Invoke-AtomicTest T1059.001 -TestNumbers 1 -Session $sess -
Once this is finished, go back to the Discover tab in Kibana:
http://localhost:5601/app/discover#/ -
In the search bar type "
mimikatz" and hit Enter. You should see results filtered to show the events matching the Mimikatz attack you just executed.
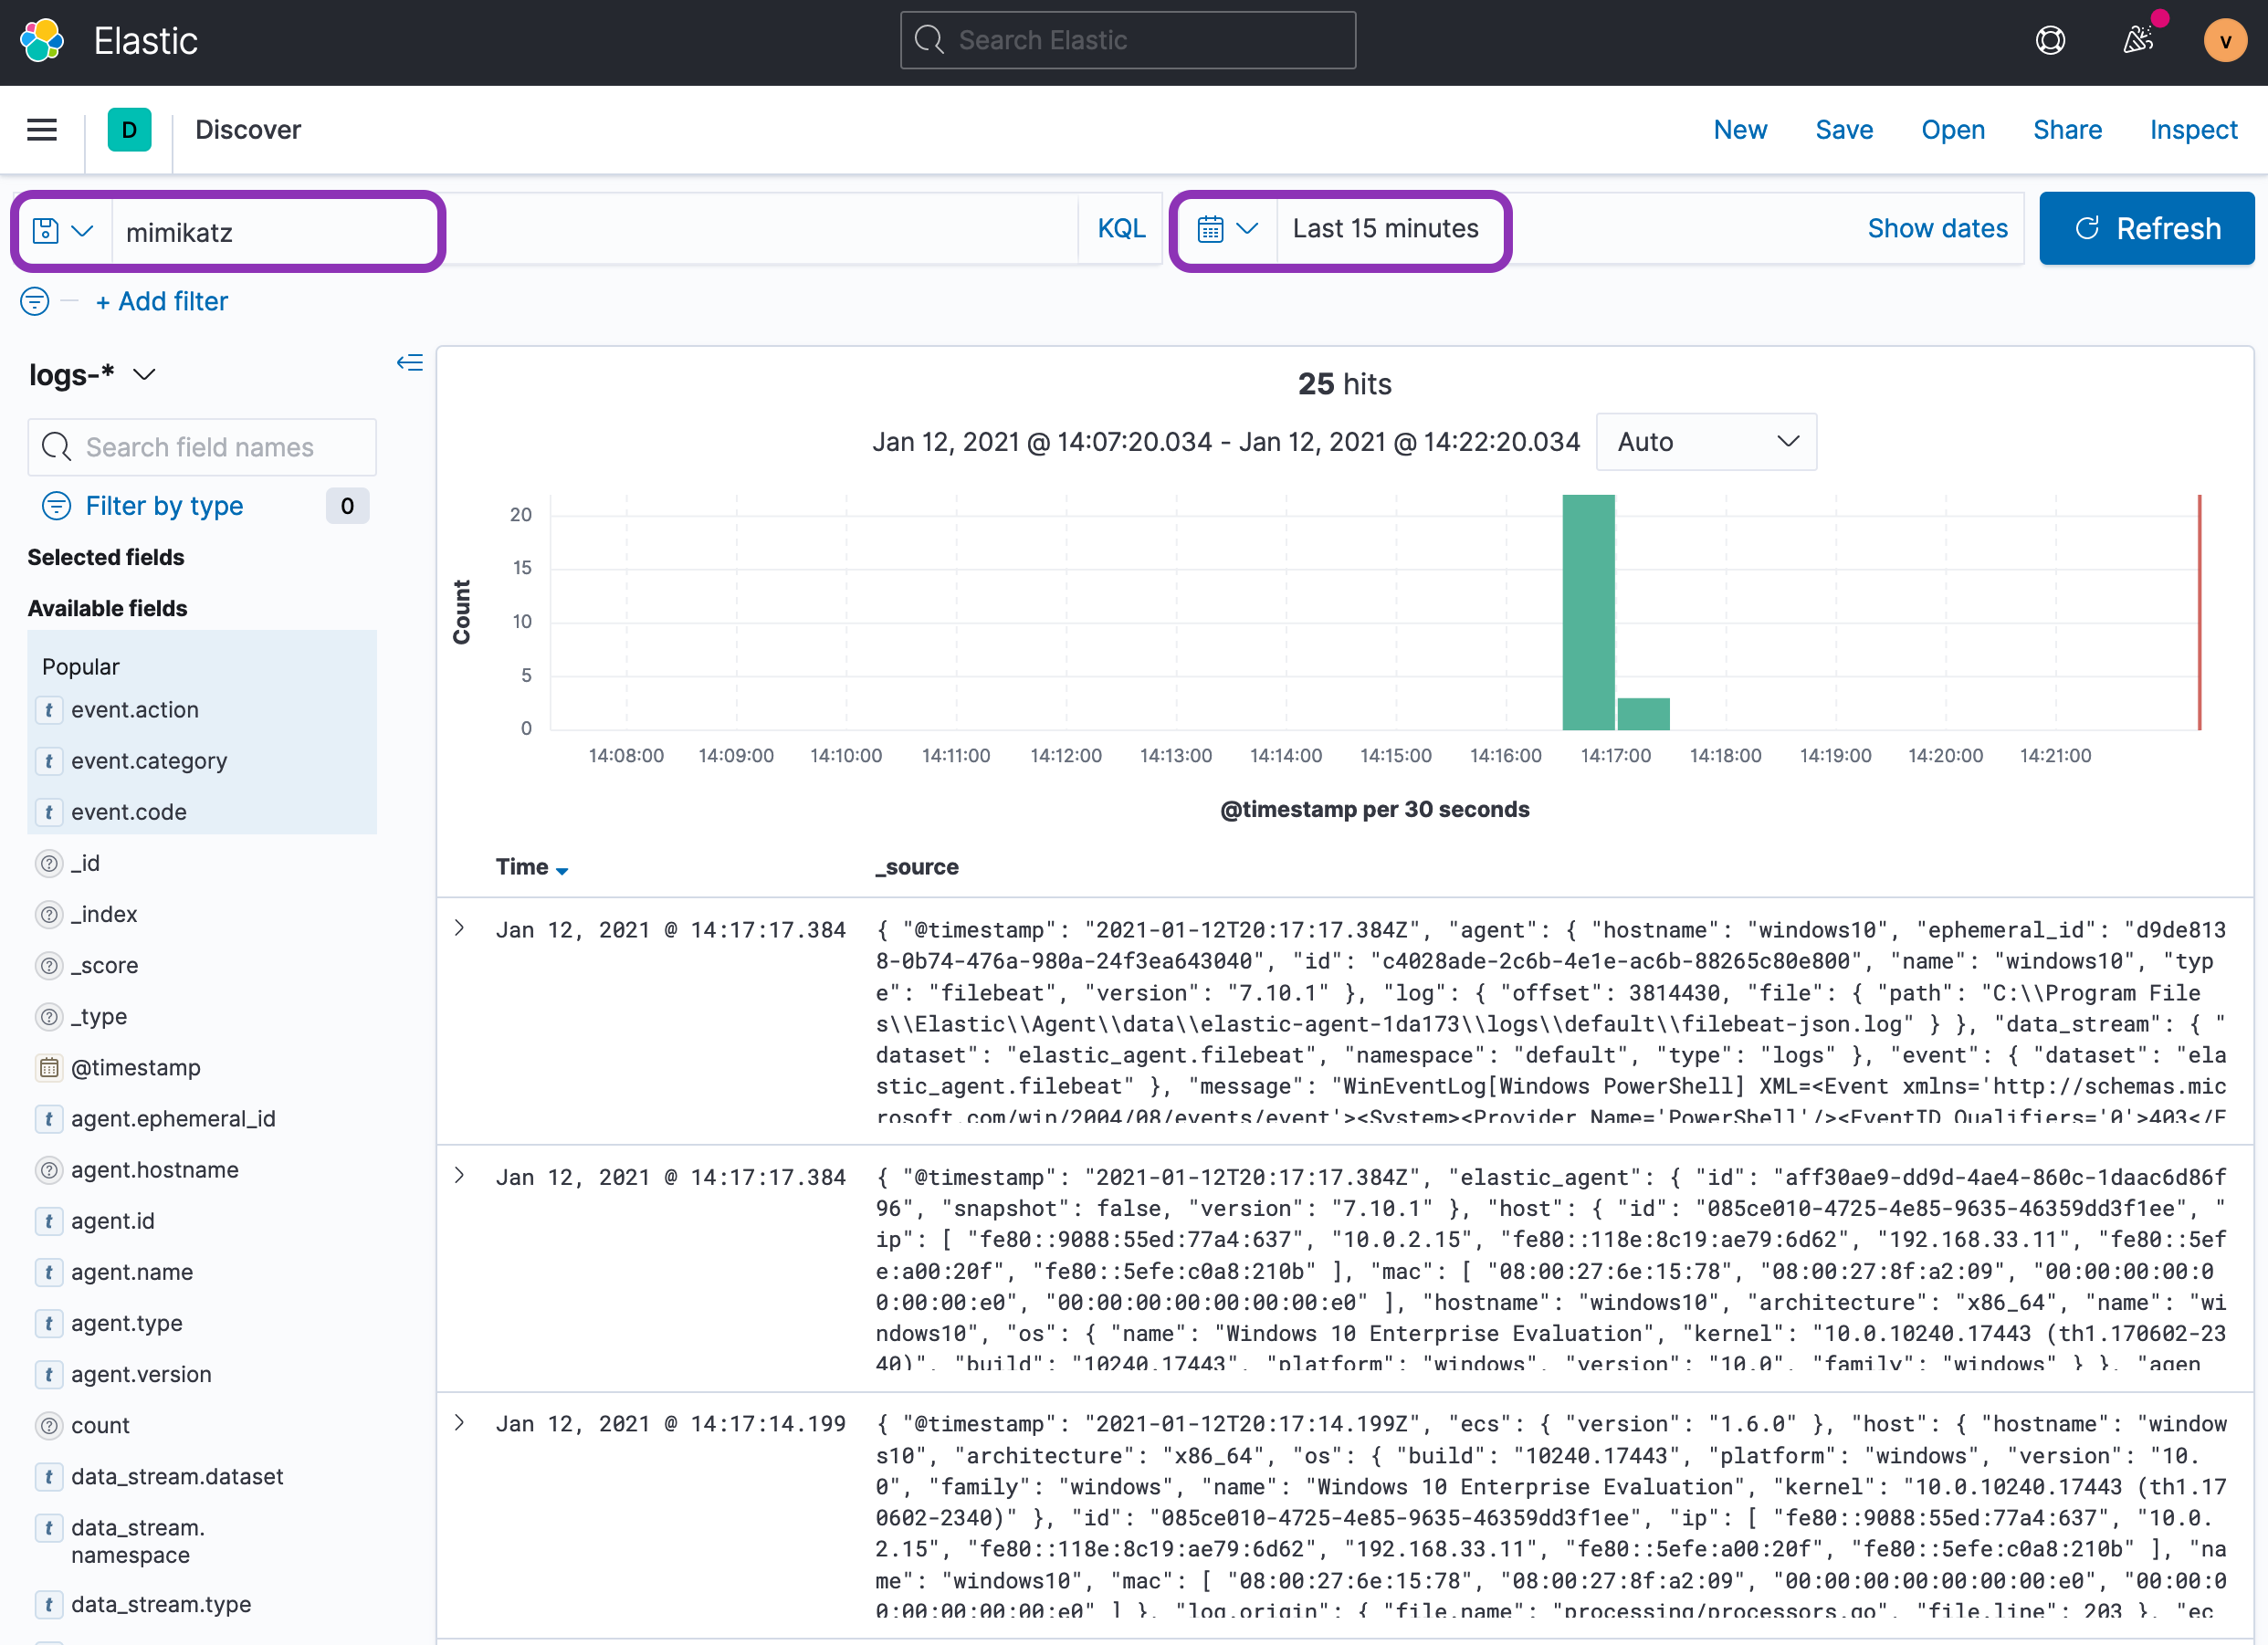
Tip
Your simple KQL query for "Mimikatz" is case-insensitive, but ensure that your timepicker is set to something sensible like "Today" or "Last 15 minutes". Kibana is (rightfully) very picky about time.
Reset Button
Clean logs -- clean mind right? While the data in Kibana is separated by the fact that it's time-series data, it can be helpful to clear previous attacks and leftover artifacts, especially in an education setting. Let's talk about how to hit the reset button.
Target Systems
Info
The term "target systems" refers to the ts.windows10 and ts.centos7 boxes.
Most of (if not all) Atomic Red Team tests come with a cleanup command to clear your target system before executing another test.
-
In order to cleanup our Mimikatz test we can run the same command we used to execute it this time with a
-Cleanupoption at the end. -
Run the following command to clean house:
Invoke-AtomicTest T1059.001 -TestNumbers 1 -Session $sess -Cleanup
Attacker / Logger System
The "control" node that is used to perform all attacking and logging operations is the ts.elatomic box. We can use the stationctl CLI to perform a data reset. This will clear all existing Elasticsearch index data to wipe the slate clean. Station control should be executed from the vagrant/ folder, so ensure that you're in the right folder: <THIS-PROJECT-REPO>/vagrant/.
-
You can perform a "Clear Data" operation with the following commands:
- Start CLI: $
./stationctl - Enter option #4:
Management: tune and troubleshoot - Enter option #6:
Clear Data: delete data in all indexes
- Start CLI: $
![]()
Next Steps
Now that we've passed the functions check and you're able to dig into all of the events, you can jump right into building detections based off of the logs produced using Thremulation Station. You can then run the test again to verify your detection logic is sound.
As for next immediate steps, you have a few options:
Toolset Section
If you'd like to dig deeper into all the tools that have been made available in Thremulation Station, head over to the Tool Usage section in the top navigation bar. There you will find details and user walkthroughs on some of the most important tools in the belt.
Lone Wolf
If you already know what you're doing, and know what you want TS to do for you, help us by doing great things and contributing to the project!
Conclusion
Regardless of the path you choos, congrats! You executed your first test and hopefully took some notes on how the project works.